No edit summary Tag: Source edit |
No edit summary Tag: Source edit |
||
| (30 intermediate revisions by 5 users not shown) | |||
| Line 3: | Line 3: | ||
|attack = Varies |
|attack = Varies |
||
|health = Varies |
|health = Varies |
||
| − | |role = Variant Dependent |
||
}}'''Robo-Fortune''' is a ranged harasser and zoning character, keeping her opponents away from her while still maintaining her offensive potency. Robo-Fortune has many ranged attacks which allows her to sustain a barrage of projectiles while keeping a safe distance from counterattacks, allowing her to avoid retaliation. |
}}'''Robo-Fortune''' is a ranged harasser and zoning character, keeping her opponents away from her while still maintaining her offensive potency. Robo-Fortune has many ranged attacks which allows her to sustain a barrage of projectiles while keeping a safe distance from counterattacks, allowing her to avoid retaliation. |
||
| Line 13: | Line 12: | ||
* '''RAM''' - Command one HEADRONE to launch forward towards the opponent. When it connects with something, it will explode. |
* '''RAM''' - Command one HEADRONE to launch forward towards the opponent. When it connects with something, it will explode. |
||
* '''MINE''' - Command one HEADRONE to plant itself in the ground to become a proximity bomb. It will stay in the ground for a lengthy period of time before exploding on its own. If an enemy gets near, it will automatically explode. |
* '''MINE''' - Command one HEADRONE to plant itself in the ground to become a proximity bomb. It will stay in the ground for a lengthy period of time before exploding on its own. If an enemy gets near, it will automatically explode. |
||
| + | |||
| + | Click [[Ones and Zeros|here]] to view her Prize Fight. |
||
== Biography == |
== Biography == |
||
| Line 22: | Line 23: | ||
{{SGM CA |
{{SGM CA |
||
|Name = Headrone Hardware |
|Name = Headrone Hardware |
||
| − | |CA = Tap the LAUNCH button to launch |
+ | |CA = Tap the LAUNCH button to launch HEADRONES. Use HEADRONES to ram enemies, set proximity mines, and fire a barrage of missiles! |
}} |
}} |
||
{{SGM MA |
{{SGM MA |
||
| Line 29: | Line 30: | ||
|MA1 = Inflicts POWER SURGE for {{Num|5/15}} seconds after every {{Num|3}} seconds while near the opponent |
|MA1 = Inflicts POWER SURGE for {{Num|5/15}} seconds after every {{Num|3}} seconds while near the opponent |
||
|Name2 = Ping Check |
|Name2 = Ping Check |
||
| − | |MA2 = Gain ENRAGE for {{Num|5/15}} seconds after every 2 seconds while far away from the opponent |
+ | |MA2 = Gain ENRAGE for {{Num|5/15}} seconds after every {{Num|2}} seconds while far away from the opponent |
| + | }} |
||
| + | {{SGM PA |
||
| + | |Name = GEIGER COUNTER |
||
| + | |PA = Robo-Fortune charges this ability each time she gains a BUFF or inflicts a DEBUFF. |
||
| + | <br>CHARGE RATE: {{Num|7%}} per BUFF or DEBUFF. |
||
| + | ACTIVATION EFFECT: Robo-Fortune gains {{Num|5}} stacks of PRECISION and reflects {{Num|5/20%}} of the damage she takes for every BUFF on her or the opponent (max {{Num|100%}}). |
||
}} |
}} |
||
| − | |||
==Variants== |
==Variants== |
||
On mobile devices, tap on the variant '''text''' to navigate to their page, not their card. |
On mobile devices, tap on the variant '''text''' to navigate to their page, not their card. |
||
| Line 38: | Line 44: | ||
{| |
{| |
||
|[[Image:Prototype.png|125px|Prototype|link=Prototype]]<center>[[Prototype]]</center> |
|[[Image:Prototype.png|125px|Prototype|link=Prototype]]<center>[[Prototype]]</center> |
||
| − | |[[Image:M- |
+ | |[[Image:M-3OW.png|125px|M-3OW|link=M-3OW]]<center>[[M-3OW]]</center> |
|} |
|} |
||
'''''Silver:''''' |
'''''Silver:''''' |
||
| Line 44: | Line 50: | ||
|[[Image:Nyanotech.png|125px|Nyanotech|link=Nyanotech]]<center>[[Nyanotech]]</center> |
|[[Image:Nyanotech.png|125px|Nyanotech|link=Nyanotech]]<center>[[Nyanotech]]</center> |
||
|[[Image:Purrminator.png|125px|Purrminator|link=Purrminator]]<center>[[Purrminator]]</center> |
|[[Image:Purrminator.png|125px|Purrminator|link=Purrminator]]<center>[[Purrminator]]</center> |
||
| − | |[[Image: |
+ | |[[Image:Blue Bomber.png|125px|Blue Bomber|link=Blue Bomber]]<center>[[Blue Bomber]]</center> |
| + | |[[Image:Vector Protector.png|125px|Vector Protector|link=Vector Protector]]<center>[[Vector Protector]]</center> |
||
|} |
|} |
||
'''''Gold:''''' |
'''''Gold:''''' |
||
{| |
{| |
||
| − | |[[Image: |
+ | |[[Image:Terror Byte.png|125px|Terror Byte|link=Terror Byte]]<center>[[Terror Byte]]</center> |
| − | |[[Image: |
+ | |[[Image:Blue Screen.png|125px|Blue Screen|link=Blue Screen]]<center>[[Blue Screen]]</center> |
| − | |[[Image: |
+ | |[[Image:Head Hunter.png|125px|Head Hunter|link=Head Hunter]]<center>[[Head Hunter]]</center> |
| − | |[[Image: |
+ | |[[Image:Persona Assistant.png|125px|Persona Assistant|link=Persona Assistant]]<center>[[Persona Assistant]]</center> |
| + | |[[Image:Number Cruncher.png|125px|Number Cruncher|link=Number Cruncher]]<center>[[Number Cruncher]]</center> |
||
|} |
|} |
||
| + | |||
| + | {| |
||
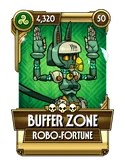
| + | |[[Image:Buffer Zone.png|125px|Buffer Zone|link=Buffer Zone]]<center>[[Buffer Zone]]</center> |
||
| + | |} |
||
| + | |||
'''''Diamond:''''' |
'''''Diamond:''''' |
||
{| |
{| |
||
| Line 76: | Line 89: | ||
| height="120px" width="120px" valign="middle" |<center>[[File:Fidget Spin B.png|100px|Fidget Spin]]</center> |
| height="120px" width="120px" valign="middle" |<center>[[File:Fidget Spin B.png|100px|Fidget Spin]]</center> |
||
|<center>'''FIDGET SPIN'''</center> |
|<center>'''FIDGET SPIN'''</center> |
||
| − | |Has a {{Num|25/50/ |
+ | |Has a {{Num|25/50/100%}} increased chance to land a CRITICAL HIT. |
|- |
|- |
||
| height="120px" width="120px" valign="middle" |<center>[[File:Phaser Burn B.png|100px|Phaser Burn]]</center> |
| height="120px" width="120px" valign="middle" |<center>[[File:Phaser Burn B.png|100px|Phaser Burn]]</center> |
||
| Line 88: | Line 101: | ||
| height="120px" width="120px" valign="middle" |<center>[[File:Rotation Hazard B.png|100px|Rotation Hazard]]</center> |
| height="120px" width="120px" valign="middle" |<center>[[File:Rotation Hazard B.png|100px|Rotation Hazard]]</center> |
||
|<center>'''ROTATION HAZARD'''</center> |
|<center>'''ROTATION HAZARD'''</center> |
||
| − | |{{Num|15/20/ |
+ | |{{Num|15/20/25%}} chance on HIT to TRANSFER 1 DEBUFF to the opponent. |
|- |
|- |
||
| height="120px" width="120px" valign="middle" |<center>[[File:Theonite Beam B.png|100px|Theonite Beam]]</center> |
| height="120px" width="120px" valign="middle" |<center>[[File:Theonite Beam B.png|100px|Theonite Beam]]</center> |
||
| Line 115: | Line 128: | ||
|<center>'''ASSAULT BATTERY'''</center> |
|<center>'''ASSAULT BATTERY'''</center> |
||
|<center>'''4'''</center> |
|<center>'''4'''</center> |
||
| − | |Level 1 Blockbuster<br />{{Num|10/15/ |
+ | |Level 1 Blockbuster<br />{{Num|10/15/20%}} chance on HIT to inflict POWER SURGE for {{Num|10}} seconds. |
|- |
|- |
||
| height="120px" width="120px" valign="middle" |<center>[[File:MAGNETIC TRAP B.png|120x120px|Magnetic Trap]] |
| height="120px" width="120px" valign="middle" |<center>[[File:MAGNETIC TRAP B.png|120x120px|Magnetic Trap]] |
||
| Line 125: | Line 138: | ||
|<center>'''CIRCUIT BREAKER'''</center> |
|<center>'''CIRCUIT BREAKER'''</center> |
||
|<center>'''6'''</center> |
|<center>'''6'''</center> |
||
| − | |Level 2 Blockbuster<br />While in detonation mode, HITS reduce BLOCKBUSTER METER by {{Num|5/7/ |
+ | |Level 2 Blockbuster<br />While in detonation mode, HITS reduce BLOCKBUSTER METER by {{Num|5/7/10%}}. Sacrifices {{Num|10%}} of your MAX HEALTH. |
|- |
|- |
||
| height="120px" width="120px" valign="middle" |<center>[[File:CATASTROPHE CANNON OMEGA B.png|120x120px|Catastrophe Cannon Omega]] |
| height="120px" width="120px" valign="middle" |<center>[[File:CATASTROPHE CANNON OMEGA B.png|120x120px|Catastrophe Cannon Omega]] |
||
|<center>'''CATASTROPHE CANNON OMEGA'''</center> |
|<center>'''CATASTROPHE CANNON OMEGA'''</center> |
||
|<center>'''7'''</center> |
|<center>'''7'''</center> |
||
| − | |Level 3 Blockbuster |
+ | |Level 3 Blockbuster<br />{{Num|2/3/5%}} chance on HIT to REMOVE {{Num|1}} opponent BUFF and deal an additional {{Num|2%}} HEALTH for each BUFF removed. Defeated opponents cannot be revived. |
|} |
|} |
||
| Line 137: | Line 150: | ||
''Notes: '' |
''Notes: '' |
||
| − | * '''''G5''' means a chain of 5 normal ground attacks |
+ | * '''''G5''' means a chain of 5 normal ground attacks (usually by tapping 5 times on the screen)'' |
| − | * '''''Up |
+ | * '''''Up''' or '''Launcher''' means the normal move that sends your opponent in the air (usually by swiping up)'' |
| − | * ''''' |
+ | * '''''A3''' means a chain of 3 normal air attacks. (usually by tapping once after having launched your opponent)'' |
* '''''Dash''' means a dash attack (swipe right once or twice)'' |
* '''''Dash''' means a dash attack (swipe right once or twice)'' |
||
* '''''Trip''' means a trip attack (swipe down once)'' |
* '''''Trip''' means a trip attack (swipe down once)'' |
||
General Notes: |
General Notes: |
||
| − | * Catastrophe Cannon Alpha does not combo naturally after your classic G5 or G5-Up- |
+ | * Catastrophe Cannon Alpha does not combo naturally after your classic G5 or G5-Up-A3 combo as the AI is generally smart enough to block BUT an inexperienced opponent may sometimes do nothing resulting in an imperfect combo. |
* If Robo-Fortune performs her taunt successfully, the number of missiles launched per head drone will increase from 4 to 7. |
* If Robo-Fortune performs her taunt successfully, the number of missiles launched per head drone will increase from 4 to 7. |
||
* You can press headrone to launch an upwards attack if you are very close but it works only against Beowulf and Big Band. |
* You can press headrone to launch an upwards attack if you are very close but it works only against Beowulf and Big Band. |
||
* If you land Magnetic Trap while under the effects of Circuit Breaker, it quickly drains the buff, usually leading to detonation right after MT. |
* If you land Magnetic Trap while under the effects of Circuit Breaker, it quickly drains the buff, usually leading to detonation right after MT. |
||
| − | Rushdown Playstyle |
+ | === Rushdown Playstyle === |
| + | Each of the combos listed here can be preceded by Dash > G5. |
||
| − | * G5 > Trip |
||
| − | * |
+ | * Trip |
| − | * |
+ | * Up > A3 > Trip |
| − | * |
+ | * Up > Rotation Hazard > CC Alpha |
| − | * |
+ | * Up > Rotation Hazard > Circuit Breaker > CC Alpha (becomes CC Gamma) |
| − | * |
+ | * Up > Rotation Hazard > Circuit Breaker > Magnetic Trap |
| − | * |
+ | * Up > Rotation Hazard > Assault Battery > Theonite Beam |
| ⚫ | |||
| − | * |
+ | * (Requires Headrone) Up > Ram |
| − | * |
+ | * Circuit Breaker > G5 > Up > A3 > Magnetic Trap (ToD in competitive) |
| ⚫ | |||
| − | * |
+ | * Up > Fidget Spin > Trip |
| − | * |
+ | * Up > A3 > Fidget Spin > Assault Battery > Circuit Breaker > Magnetic Trap |
| − | * |
+ | * (Requires Headrone) - G5 > Ram > G3 > Assault Battery > Circuit Breaker > Magnetic Trap |
| ⚫ | |||
| − | * SITUATIONAL |
||
| + | |||
| ⚫ | |||
| + | ==== Situational combos ==== |
||
| ⚫ | |||
| + | Each of the combos listed here can be preceded by Dash > G5. |
||
| ⚫ | |||
| − | + | * (Right Corner) Up > Rotation Hazard > Magnetic Trap > Assault Battery |
|
| ⚫ | |||
| ⚫ | |||
| ⚫ | |||
| + | * (Right Corner) Up > A3 > Fidget Spin > Assault Battery > Rotation Hazard > CC Alpha |
||
| ⚫ | |||
* G5 > Trip |
* G5 > Trip |
||
* G5 > Phaser Burn |
* G5 > Phaser Burn |
||
| − | * G5 > Up > |
+ | * G5 > Up > A3 > Trip |
| − | * G5 > Up > |
+ | * G5 > Up > A3 > Theonite Beam |
| − | * G5 > Up > |
+ | * G5 > Up > A3 > Fidget Spin > Theonite Beam |
| − | * |
+ | * Dash > G5 > Up > A3 > Fidget Spin > Theonite Beam, Phaser Burn or Trip |
| − | * |
+ | * (Requires Headrone) Really Talks > Salvo > Grab > Theonite Beam |
| − | * |
+ | * (Requires Headrone) Really Talks > Salvo > Grab > Fidget Spin > Theonite Beam |
| − | * |
+ | * (Requires Headrone) Really Talks > Salvo > Grab > CC Alpha |
| − | * |
+ | * (Requires Headrone) Really Talks > Salvo > Grab > Circuit Breaker > CC Alpha (CC Gamma) |
| − | * |
+ | * (When the opponent is dashing towards you) Variable Cutter > Theonite Beam |
| − | ** Variable Cutter > Theonite Beam |
||
== Gallery == |
== Gallery == |
||
| Line 188: | Line 203: | ||
-SGM- Robo-Fortune Guide and Combos|Guide by Mornedil |
-SGM- Robo-Fortune Guide and Combos|Guide by Mornedil |
||
►ROBO FORTUNE COMBOS - SKULLGIRLS MOBILE|Guide by Leonhy |
►ROBO FORTUNE COMBOS - SKULLGIRLS MOBILE|Guide by Leonhy |
||
| + | Robo-Fortune - All Variants Discussed (Skullgirls Mobile)|Guide by Kevin Pepino |
||
| + | -Beginner Guide - Skullgirls Mobile- Easy Gameplay for Robo-Fortune|Guide by ZeoW |
||
</gallery> |
</gallery> |
||
Latest revision as of 03:04, 31 December 2023
Robo-Fortune is a ranged harasser and zoning character, keeping her opponents away from her while still maintaining her offensive potency. Robo-Fortune has many ranged attacks which allows her to sustain a barrage of projectiles while keeping a safe distance from counterattacks, allowing her to avoid retaliation.
As far as her base stats are concerned, Robo-Fortune is purely a wildcard. Unlike other characters, Robo-Fortune has no true stat paradigm, and all of her stats are determined on a per variant basis. While one Robo-Fortune variant might be as tanky as a Big Band Fighter, another Robo-Fortune variant may be a glass cannon.
Robo-Fortune has a Character Ability that allows her to summon a "HEADRONE" that floats near her until it receives a command. Her Character Ability actions are as follows:
- HEADRONE LAUNCH - Robo-Fortune will crouch down and spawn a new HEADRONE. A maximum of three HEADRONES can be spawned.
- SALVO - Command ALL available HEADRONES to launch homing missiles at the opponent. The more HEADRONES that are used in this command, the more powerful the homing capabilities of the missiles!
- RAM - Command one HEADRONE to launch forward towards the opponent. When it connects with something, it will explode.
- MINE - Command one HEADRONE to plant itself in the ground to become a proximity bomb. It will stay in the ground for a lengthy period of time before exploding on its own. If an enemy gets near, it will automatically explode.
Click here to view her Prize Fight.
Biography
Robo-Fortune is the creation of Brain Drain, the psychic director of ASG Lab Zero, in the likeness of Nadia Fortune and stands as a testament to her maniacal creator’s unmatched pride and petulance. Built to demonstrate loyalty and cunning, Robo-Fortune fails to deliver either to any measurable degree. Employing cutting-edge technology, she sets out to hunt down the Skullgirl, and to engage in easily avoidable conflicts.
Is the ASG Project’s latest creation the ultimate cybernetic soldier? Have Brain Drain’s mechanical machinations set the world on a treacherous path? Is Robo-Fortune’s faulty programming more of a feature than a bug? Has science gone too far?!
Abilities
Character Ability
Marquee Ability: NETWORK PROTOCOL
Prestige Ability
|
Variants
On mobile devices, tap on the variant text to navigate to their page, not their card.
Bronze:
 |
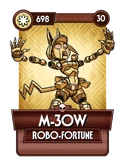 |
Silver:
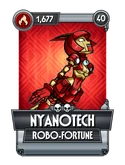 |
 |
 |
 |
Gold:
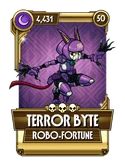 |
 |
 |
 |
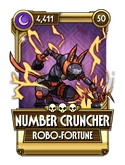 |
 |
Diamond:
 |
 |
Special Moves
 |
On HIT, inflict POWER SURGE for 5/7/10 seconds. | |
 |
Forces the opponent to TAG OUT on HIT, removing all COMBAT EFFECTS. | |
 |
Has a 25/50/100% increased chance to land a CRITICAL HIT. | |
 |
15/25/35% chance on HIT to REMOVE 1 opponent BUFF and inflict STUN for 3 seconds. | |
 |
TAUNT your opponent to gain BARRIER for 10/12/15 seconds. | |
 |
15/20/25% chance on HIT to TRANSFER 1 DEBUFF to the opponent. | |
 |
On HIT, DISABLES TAG-INS, SPECIAL MOVES, or BLOCKBUSTERS for 5/7/10 seconds. Inflict ARMOR BREAK for 10 seconds if BLOCKED. | |
 |
50% chance on HIT to inflict STUN for 4 seconds and POWER SURGE for 10/12/15 seconds if the opponent is DASHING. |
Blockbusters
 |
Level 1 Blockbuster CRITICAL HITS inflict WITHER for 5/7/10 seconds. | ||

|
Level 1 Blockbuster 10/15/20% chance on HIT to inflict POWER SURGE for 10 seconds. | ||

|
Level 2 Blockbuster 25/35/50% of the damage dealt is regained as HEALTH. Gain BARRIER for 10 seconds on HIT. | ||

|
Level 2 Blockbuster While in detonation mode, HITS reduce BLOCKBUSTER METER by 5/7/10%. Sacrifices 10% of your MAX HEALTH. | ||

|
Level 3 Blockbuster 2/3/5% chance on HIT to REMOVE 1 opponent BUFF and deal an additional 2% HEALTH for each BUFF removed. Defeated opponents cannot be revived. |
Combos
Robo-Fortune can play as either a close-quarters fighter (rushdown) or a ranged fighter (projectile) but to achieve her maximum potential you need to commit to either one of these playstyles and tailor your moveset to achieve your intended strategy. Mixing strategies in a single combat is not recommended as Robo-Fortune's special moves and Block Busters (BBs) usually belong to either one of these categories and usually only chain between themselves.
Notes:
- G5 means a chain of 5 normal ground attacks (usually by tapping 5 times on the screen)
- Up or Launcher means the normal move that sends your opponent in the air (usually by swiping up)
- A3 means a chain of 3 normal air attacks. (usually by tapping once after having launched your opponent)
- Dash means a dash attack (swipe right once or twice)
- Trip means a trip attack (swipe down once)
General Notes:
- Catastrophe Cannon Alpha does not combo naturally after your classic G5 or G5-Up-A3 combo as the AI is generally smart enough to block BUT an inexperienced opponent may sometimes do nothing resulting in an imperfect combo.
- If Robo-Fortune performs her taunt successfully, the number of missiles launched per head drone will increase from 4 to 7.
- You can press headrone to launch an upwards attack if you are very close but it works only against Beowulf and Big Band.
- If you land Magnetic Trap while under the effects of Circuit Breaker, it quickly drains the buff, usually leading to detonation right after MT.
Rushdown Playstyle
Each of the combos listed here can be preceded by Dash > G5.
- Trip
- Up > A3 > Trip
- Up > Rotation Hazard > CC Alpha
- Up > Rotation Hazard > Circuit Breaker > CC Alpha (becomes CC Gamma)
- Up > Rotation Hazard > Circuit Breaker > Magnetic Trap
- Up > Rotation Hazard > Assault Battery > Theonite Beam
- Up > Rotation Hazard > Assault Battery > Circuit Breaker > Magnetic Trap
- (Requires Headrone) Up > Ram
- Circuit Breaker > G5 > Up > A3 > Magnetic Trap (ToD in competitive)
- Up > Fidget Spin > Trip
- Up > A3 > Fidget Spin > Assault Battery > Circuit Breaker > Magnetic Trap
- (Requires Headrone) - G5 > Ram > G3 > Assault Battery > Circuit Breaker > Magnetic Trap
- Up > A3 > Fidget Spin > Theonite Beam/ Phaser Burn/ Trip
Situational combos
Each of the combos listed here can be preceded by Dash > G5.
- (Right Corner) Up > Rotation Hazard > Magnetic Trap > Assault Battery
- (Right Corner) Up > A3 > Rotation Hazard > Assault Battery > Magnetic Trap
- (Requires Headrone) Up > Ram > G5
- (Right Corner) Up > A3 > Fidget Spin > Assault Battery > Rotation Hazard > CC Alpha
Projectile Playstyle
- G5 > Trip
- G5 > Phaser Burn
- G5 > Up > A3 > Trip
- G5 > Up > A3 > Theonite Beam
- G5 > Up > A3 > Fidget Spin > Theonite Beam
- Dash > G5 > Up > A3 > Fidget Spin > Theonite Beam, Phaser Burn or Trip
- (Requires Headrone) Really Talks > Salvo > Grab > Theonite Beam
- (Requires Headrone) Really Talks > Salvo > Grab > Fidget Spin > Theonite Beam
- (Requires Headrone) Really Talks > Salvo > Grab > CC Alpha
- (Requires Headrone) Really Talks > Salvo > Grab > Circuit Breaker > CC Alpha (CC Gamma)
- (When the opponent is dashing towards you) Variable Cutter > Theonite Beam
Gallery
")
")
")
")
 (37 KB)")
")