mNo edit summary Tag: Visual edit |
Tag: Source edit |
||
| (17 intermediate revisions by 4 users not shown) | |||
| Line 1: | Line 1: | ||
| − | {{SGM_Char|image1 = Eliza_Portrait.png|attack = ★★★✩✩|health = ★★★★✩|role = Specialist}}Eliza is a “techy” character who relies heavily on getting into specific combat scenarios and using atypical strategies. She is capable of dealing lots of damage if the player is able to master her more technical move-sets. |
+ | {{SGM_Char|image1 = Eliza_Portrait.png|attack = ★★★✩✩|health = ★★★★✩|role = Specialist}}'''Eliza''' is a “techy” character who relies heavily on getting into specific combat scenarios and using atypical strategies. She is capable of dealing lots of damage if the player is able to master her more technical move-sets. |
Eliza has higher than average base Health, which helps to reinforce her role as a rare, boss-type character. Although she has a middle-of-the-road Attack value, this can be overcome if the player maximizes her more technical abilities. |
Eliza has higher than average base Health, which helps to reinforce her role as a rare, boss-type character. Although she has a middle-of-the-road Attack value, this can be overcome if the player maximizes her more technical abilities. |
||
Eliza leverages a number of “risky” abilities that have significant upside if used correctly, but can backfire if the player fails to use them thoughtfully. She induces a multitude of combat effects on herself and on her enemies, requiring a strategic approach to every fight. |
Eliza leverages a number of “risky” abilities that have significant upside if used correctly, but can backfire if the player fails to use them thoughtfully. She induces a multitude of combat effects on herself and on her enemies, requiring a strategic approach to every fight. |
||
| + | |||
| + | == Character Background == |
||
| + | '''Eliza''' is the celebrity diva of New Meridian’s premiere nightclub, Bastet’s Den. Unbeknownst to the club’s patrons, however, she’s also been host to the skeletal Parasite Sekhmet for untold years. Widely known for her blood drive charities, in reality these serve to feed Sekhmet and maintain Eliza’s ageless beauty. Recently discovered and blackmailed by the Medici into pursuing the Skull Heart, Eliza’s ancient ambitions stir once more… |
||
| + | |||
==Abilities== |
==Abilities== |
||
{{SGM CA |
{{SGM CA |
||
|Name = WARRIOR GODDESS |
|Name = WARRIOR GODDESS |
||
| − | |CA = BLOCKBUSTERS involving Sekhmet now leave Eliza in Sekhmet Mode for a short duration. All damage taken while in Sekhmet mode is recoverable |
+ | |CA = BLOCKBUSTERS involving Sekhmet now leave Eliza in Sekhmet Mode for a short duration. All damage taken while in Sekhmet mode is recoverable. |
}} |
}} |
||
{{SGM MA |
{{SGM MA |
||
| Line 14: | Line 18: | ||
|MA1 = Whenever a teammate is defeated, Eliza regains {{Num|30/50%}} HEALTH |
|MA1 = Whenever a teammate is defeated, Eliza regains {{Num|30/50%}} HEALTH |
||
|Name2 = RITUAL SACRIFICE |
|Name2 = RITUAL SACRIFICE |
||
| − | |MA2 = Whenever a teammate is defeated, Eliza gains {{Num|50/100%}} METER |
+ | |MA2 = Whenever a teammate is defeated, Eliza gains {{Num|50/100%}} BLOCKBUSTER METER |
}} |
}} |
||
| + | |||
==Variants== |
==Variants== |
||
On mobile devices, tap on the variant '''text''' to navigate to their page, not their card. |
On mobile devices, tap on the variant '''text''' to navigate to their page, not their card. |
||
| Line 36: | Line 41: | ||
|[[Image:Red Velvet.png|125px|Red Velvet|link=Red Velvet]]<center>[[Red Velvet]]</center> |
|[[Image:Red Velvet.png|125px|Red Velvet|link=Red Velvet]]<center>[[Red Velvet]]</center> |
||
|[[Image:Lapis Luxury.png|125px|Lapis Luxury|link=Lapis Luxury]]<center>[[Lapis Luxury]]</center> |
|[[Image:Lapis Luxury.png|125px|Lapis Luxury|link=Lapis Luxury]]<center>[[Lapis Luxury]]</center> |
||
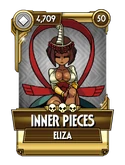
| + | |[[File:Inner_Pieces.png|Inner Pieces|link=Inner Pieces|125px]]<center>[[Inner Pieces]]</center> |
||
|} |
|} |
||
'''''Diamond:''''' |
'''''Diamond:''''' |
||
| Line 43: | Line 49: | ||
|} |
|} |
||
<br /> |
<br /> |
||
| + | |||
==Special Moves== |
==Special Moves== |
||
{| class="article-table" border="1" cellspacing="1" cellpadding="1" style="width:100%;" |
{| class="article-table" border="1" cellspacing="1" cellpadding="1" style="width:100%;" |
||
|- |
|- |
||
| − | ! scope="col" |Icon |
+ | ! scope="col" style="width:15%;"|<center>Icon |
| − | ! scope="col" |Name |
+ | ! scope="col" style="width:35%;"|<center>Name |
| − | ! scope="col" |Description |
+ | ! scope="col" style="width:50%;"|<center>Description |
|- |
|- |
||
| height="120px" width="120px" valign="middle" |<center>[[Image:Eliza Burst.png|100px|Burst]]</center> |
| height="120px" width="120px" valign="middle" |<center>[[Image:Eliza Burst.png|100px|Burst]]</center> |
||
| − | |'''BURST''' |
+ | |<center>'''BURST''' |
| − | |On HIT, inflict |
+ | |On HIT, inflict CURSE for {{Num|5/7/10}} seconds. |
|- |
|- |
||
| height="120px" width="120px" valign="middle" |<center>[[Image:Chaos Banish.png|100px|Chaos Banish]]</center> |
| height="120px" width="120px" valign="middle" |<center>[[Image:Chaos Banish.png|100px|Chaos Banish]]</center> |
||
| − | |'''CHAOS BANISH''' |
+ | |<center>'''CHAOS BANISH''' |
| − | |Removes all BUFFS from the opponent and inflicts HEAL BLOCK for |
+ | |Removes all BUFFS from the opponent and inflicts HEAL BLOCK for {{Num|4/8/12}} seconds (also applies on BLOCK). |
|- |
|- |
||
| − | | height="120px" width="120px" valign="middle" |<center>[[Image:Dive of Horus.png| |
+ | | height="120px" width="120px" valign="middle" |<center>[[Image:Dive of Horus.png|100px|Dive of Horus]]</center> |
| − | |'''DIVE OF HORUS''' |
+ | |<center>'''DIVE OF HORUS''' |
| − | |Has a |
+ | |Has a {{Num|25/50/100%}} increased chance to land a CRITICAL HIT. |
|- |
|- |
||
| height="120px" width="120px" valign="middle" |<center>[[Image:Exile from Aaru.png|100px|Exile From Aaru]]</center> |
| height="120px" width="120px" valign="middle" |<center>[[Image:Exile from Aaru.png|100px|Exile From Aaru]]</center> |
||
| − | |'''EXILE FROM AARAU''' |
+ | |<center>'''EXILE FROM AARAU''' |
| − | |Forces |
+ | |Forces the opponent to TAG OUT on HIT, removing all COMBAT EFFECTS. |
|- |
|- |
||
| − | | height="120px" width="120px" valign="middle" |<center>[[Image:Middle of the Sphynx.png| |
+ | | height="120px" width="120px" valign="middle" |<center>[[Image:Middle of the Sphynx.png|100px|Middle of the Sphynx]]</center> |
| − | |'''MIDDLE OF THE SPHYNX''' |
+ | |<center>'''MIDDLE OF THE SPHYNX''' |
| − | |On HIT, reduce |
+ | |On HIT, reduce opponent BLOCKBUSTER METER by {{Num|25/35/50%}}. |
|- |
|- |
||
| − | | height="120px" width="120px" valign="middle" |<center>[[Image:Osiris Spiral.png| |
+ | | height="120px" width="120px" valign="middle" |<center>[[Image:Osiris Spiral.png|100px|Osiris Spiral]]</center> |
| − | |'''OSIRIS SPIRAL''' |
+ | |<center>'''OSIRIS SPIRAL''' |
| − | | |
+ | |{{Num|5/??/10%}} chance on HIT to inflict HEAVY BLEED for {{Num|5/??/10}} seconds. |
|- |
|- |
||
| − | | height="120px" width="120px" valign="middle" |<center>[[Image:Scarlet Ladies.png| |
+ | | height="120px" width="120px" valign="middle" |<center>[[Image:Scarlet Ladies.png|100px|Scarlet Ladies]]</center> |
| − | |'''SCARLET LADIES''' |
+ | |<center>'''SCARLET LADIES''' |
| − | |TAUNT your opponent to gain REGEN for |
+ | |TAUNT your opponent to gain REGEN for {{Num|10/12/15}} seconds. |
|- |
|- |
||
| − | | height="120px" width="120px" valign="middle" |<center>[[Image:Throne of Isis.png| |
+ | | height="120px" width="120px" valign="middle" |<center>[[Image:Throne of Isis.png|100px|Throne of Isis]]</center> |
| − | |'''THRONE OF ISIS''' |
+ | |<center>'''THRONE OF ISIS''' |
| − | |No |
+ | |No Effects. |
|- |
|- |
||
| − | | height="120px" width="120px" valign="middle" |<center>[[Image:Upper Khat.png| |
+ | | height="120px" width="120px" valign="middle" |<center>[[Image:Upper Khat.png|100px|Upper Khat]]</center> |
| − | |'''UPPER KHAT''' |
+ | |<center>'''UPPER KHAT''' |
| − | | |
+ | |{{Num|25/50%}} chance on HIT to STUN opponent for {{Num|4/6}} seconds. |
| + | |||
| + | Tap up to 3 times. |
||
|- |
|- |
||
| − | | height="120px" width="120px" valign="middle" |<center>[[Image:Weight Of Anubis.png| |
+ | | height="120px" width="120px" valign="middle" |<center>[[Image:Weight Of Anubis.png|100px|Weight Of Anubis]]</center> |
| − | |'''WEIGHT OF ANUBIS''' |
+ | |<center>'''WEIGHT OF ANUBIS''' |
| − | |No |
+ | |No Effects. |
|} |
|} |
||
| + | |||
==Blockbusters== |
==Blockbusters== |
||
| − | {| class="article-table" border="1" cellspacing="1" cellpadding="1" style="width |
+ | {| class="article-table" border="1" cellspacing="1" cellpadding="1" style="width:100%;" |
|- |
|- |
||
| − | ! scope="col" |Icon |
+ | ! scope="col" style="width:15%;"|<center>Icon</center> |
| − | ! scope="col" |Name |
+ | ! scope="col" style="width:20%;"|<center>Name</center> |
| − | ! scope="col" |Gear |
+ | ! scope="col" style="width:15%;"|<center>Gear Points</center> |
| − | ! scope="col" |Description |
+ | ! scope="col" style="width:50%;"|<center>Description</center> |
|- |
|- |
||
| − | | height="120px" width="120px" valign="middle" |<center>[[Image:Sekhmets Bite.png| |
+ | | height="120px" width="120px" valign="middle" |<center>[[Image:Sekhmets Bite.png|120x120px|Sekhmet's Bite]]</center> |
| − | |'''SEKHMET'S BITE''' |
+ | |<center>'''SEKHMET'S BITE''' |
|<center>'''3'''</center> |
|<center>'''3'''</center> |
||
| − | |Level 1 Blockbuster (Sekhmet)<br /> |
+ | |Level 1 Blockbuster (Sekhmet)<br />{{Num|25/35/50%}} chance on HIT to inflict ARMOR BREAK and CURSE for {{Num|10}} seconds. |
|- |
|- |
||
| − | | height="120px" width="120px" valign="middle" |<center>[[Image:Sekhmets Turn.png| |
+ | | height="120px" width="120px" valign="middle" |<center>[[Image:Sekhmets Turn.png|120x120px|Sekhmet's Turn]]</center> |
| − | |'''SEKHMET'S TURN''' |
+ | |<center>'''SEKHMET'S TURN''' |
|<center>3</center> |
|<center>3</center> |
||
| − | |Level 1 Blockbuster (Sekhmet)<br /> |
+ | |Level 1 Blockbuster (Sekhmet)<br />{{Num|25/35/50%}} chance on HIT to inflict BLEED and HEALBLOCK for {{Num|10}} seconds. |
|- |
|- |
||
| − | | height="120px" width="120px" valign="middle" |<center>[[Image:Sekhmets Fury.png| |
+ | | height="120px" width="120px" valign="middle" |<center>[[Image:Sekhmets Fury.png|120x120px|Sekhmet's Fury]]</center> |
| − | |'''SEKHMET'S FURY''' |
+ | |<center>'''SEKHMET'S FURY''' |
|<center>4</center> |
|<center>4</center> |
||
| − | |Level 1 Blockbuster (Sekhmet)<br /> |
+ | |Level 1 Blockbuster (Sekhmet)<br />{{Num|25/35/50%}} chance on HIT to gain ENRAGE and HASTE for {{Num|10}} seconds. |
|- |
|- |
||
| height="120px" width="120px" valign="middle" |<center>[[Image:Khepri Sun.png|120x120px|Khepri Sun]]</center> |
| height="120px" width="120px" valign="middle" |<center>[[Image:Khepri Sun.png|120x120px|Khepri Sun]]</center> |
||
| − | |'''KHEPRI SUN''' |
+ | |<center>'''KHEPRI SUN''' |
|<center>5</center> |
|<center>5</center> |
||
| − | |Level 2 Blockbuster<br /> |
+ | |Level 2 Blockbuster<br />Deals {{Num|25/35/50%}} bonus damage if the opponent is suffering a DEBUFF. |
|- |
|- |
||
| − | | height="120px" width="120px" valign="middle" |<center>[[Image:Nekhbet Breaker.png| |
+ | | height="120px" width="120px" valign="middle" |<center>[[Image:Nekhbet Breaker.png|120x120px|Nekhbet Breaker]]</center> |
| − | |'''NEKHBET BREAKER''' |
+ | |<center>'''NEKHBET BREAKER''' |
|<center>6</center> |
|<center>6</center> |
||
| − | |Level 2 Blockbuster<br /> |
+ | |Level 2 Blockbuster<br />{{Num|25/35/50%}} chance on HIT to inflict ARMOR BREAK for {{Num|8}} seconds. |
|- |
|- |
||
| − | | height="120px" width="120px" valign="middle" |<center>[[Image:Lady of Slaughter.png| |
+ | | height="120px" width="120px" valign="middle" |<center>[[Image:Lady of Slaughter.png|120x120px|Lady of Slaughter]]</center> |
| − | |'''LADY OF SLAUGHTER''' |
+ | |<center>'''LADY OF SLAUGHTER''' |
|<center>7</center> |
|<center>7</center> |
||
| − | |Level 3 Blockbuster (UNBLOCKABLE) (Sekhmet)<br /> |
+ | |Level 3 Blockbuster (UNBLOCKABLE) (Sekhmet)<br />{{Num|50/75/100%}} chance to inflict a random DEBUFF for {{Num|10}} seconds and set the opponent's SPECIAL MOVES and TAG INS on COOLDOWN. |
|} |
|} |
||
| Line 154: | Line 164: | ||
* (Right corner) G5 > Chaos Banish > Osiris spiral > (optional:sekhmet's bite > sekhmet 3 > launcher) > upper khat |
* (Right corner) G5 > Chaos Banish > Osiris spiral > (optional:sekhmet's bite > sekhmet 3 > launcher) > upper khat |
||
* (Right corner) G5 > Chaos banish > Osiris spiral > D1 > Middle of the spinx (both hits) |
* (Right corner) G5 > Chaos banish > Osiris spiral > D1 > Middle of the spinx (both hits) |
||
| + | |||
| + | == Gallery == |
||
| + | <gallery> |
||
| + | Full Eliza Combo Guide Breakdown and Combo Compilation!! Subscriber Special🎉🎉 - SkullGirls Mobile|Guide by OddLegend |
||
| + | ►ELIZA COMBOS - SKULLGIRLS MOBILE|Guide by Leonhy |
||
| + | -Beginner Guide - Skullgirls Mobile- Easy Gameplay for Eliza|Guide by ZeoW |
||
| + | </gallery> |
||
| + | |||
[[Category:Characters]] |
[[Category:Characters]] |
||
[[Category:Eliza]] |
[[Category:Eliza]] |
||
Revision as of 05:24, 20 January 2021
Eliza is a “techy” character who relies heavily on getting into specific combat scenarios and using atypical strategies. She is capable of dealing lots of damage if the player is able to master her more technical move-sets.
Eliza has higher than average base Health, which helps to reinforce her role as a rare, boss-type character. Although she has a middle-of-the-road Attack value, this can be overcome if the player maximizes her more technical abilities.
Eliza leverages a number of “risky” abilities that have significant upside if used correctly, but can backfire if the player fails to use them thoughtfully. She induces a multitude of combat effects on herself and on her enemies, requiring a strategic approach to every fight.
Character Background
Eliza is the celebrity diva of New Meridian’s premiere nightclub, Bastet’s Den. Unbeknownst to the club’s patrons, however, she’s also been host to the skeletal Parasite Sekhmet for untold years. Widely known for her blood drive charities, in reality these serve to feed Sekhmet and maintain Eliza’s ageless beauty. Recently discovered and blackmailed by the Medici into pursuing the Skull Heart, Eliza’s ancient ambitions stir once more…
Abilities
Character Ability
Marquee Ability: BLOODLINE
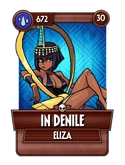
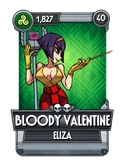
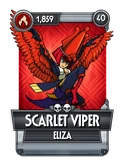
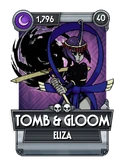
Variants
On mobile devices, tap on the variant text to navigate to their page, not their card.
Bronze:
 |
 |
Silver:
 |
 |
 |
Gold:
 |
 |
 |
 |
 |
Diamond:
 |
 |
Special Moves
 |
On HIT, inflict CURSE for 5/7/10 seconds. | |
 |
Removes all BUFFS from the opponent and inflicts HEAL BLOCK for 4/8/12 seconds (also applies on BLOCK). | |
 |
Has a 25/50/100% increased chance to land a CRITICAL HIT. | |
 |
Forces the opponent to TAG OUT on HIT, removing all COMBAT EFFECTS. | |
 |
On HIT, reduce opponent BLOCKBUSTER METER by 25/35/50%. | |
 |
5/??/10% chance on HIT to inflict HEAVY BLEED for 5/??/10 seconds. | |
 |
TAUNT your opponent to gain REGEN for 10/12/15 seconds. | |
 |
No Effects. | |
 |
25/50% chance on HIT to STUN opponent for 4/6 seconds.
Tap up to 3 times. | |
 |
No Effects. |
Blockbusters
 |
Level 1 Blockbuster (Sekhmet) 25/35/50% chance on HIT to inflict ARMOR BREAK and CURSE for 10 seconds. | ||
 |
Level 1 Blockbuster (Sekhmet) 25/35/50% chance on HIT to inflict BLEED and HEALBLOCK for 10 seconds. | ||
 |
Level 1 Blockbuster (Sekhmet) 25/35/50% chance on HIT to gain ENRAGE and HASTE for 10 seconds. | ||
 |
Level 2 Blockbuster Deals 25/35/50% bonus damage if the opponent is suffering a DEBUFF. | ||
 |
Level 2 Blockbuster 25/35/50% chance on HIT to inflict ARMOR BREAK for 8 seconds. | ||
 |
Level 3 Blockbuster (UNBLOCKABLE) (Sekhmet) 50/75/100% chance to inflict a random DEBUFF for 10 seconds and set the opponent's SPECIAL MOVES and TAG INS on COOLDOWN. |
Combos
Notes:
- G5 means a chain of 5 normal ground attacks. (Usually by tapping 5 times on the screen)
- Up or Launcher means the normal move that sends your opponent in the air (usually by swiping up)
- A5 means a chain of 5 normal air attacks. (usually by tapping 5 times after having launched your opponent)
- D1 or Dash means a dash attack (swipe right twice)
- Trip means a trip attack (swipe down once)
Standard Combos
- Up > Dive of Horus
- G5 > Any BB1 > Up x 2
- G5 > Any BB1 > Eliza Mode > G5 > Up > A5 > Upper Khat 3 (Imperfect Combo)
- G5 > Chaos Banish > Osiris Spiral (only 2 hits will connect)
- G5 > Up > A5 > Trip
- G5 > Up > A5 > Any BB1 > Up x 2
- G5 > Upper Khat > Any BB1 > Up x 2
- G5 > Up > A5 > Upper Khat 3
- G5 > Chaos banish > Nekbet breaker
- G4 > Chaos banish > dash 1 > Middle of the sphinx (both hits connect)
- G5 > Up > Khepri Sun
Situational Combos
- (Right corner) Dash 2 > G5 > Up > A5 > Upper Khat 3
- (Right corner) G5 > Chaos Banish > Osiris spiral > (optional:sekhmet's bite > sekhmet 3 > launcher) > upper khat
- (Right corner) G5 > Chaos banish > Osiris spiral > D1 > Middle of the spinx (both hits)
Gallery
")
")
")