m (It's not really a combo if it doesn't work, though) |
Tag: Source edit |
||
| (23 intermediate revisions by the same user not shown) | |||
| Line 5: | Line 5: | ||
|health = ★★★✩✩ |
|health = ★★★✩✩ |
||
|role = Grappler |
|role = Grappler |
||
| ⚫ | |||
| − | }} |
||
| ⚫ | |||
| − | While fighting, Beowulf's Throws (including Special Move Throws) and Juggle Finishers will generate |
+ | While fighting, Beowulf's Throws (including Special Move Throws) and Juggle Finishers will generate one Hype Charge. Beowulf also gains one Hype Charge every thirty seconds in the fight. Once Beowulf gets 3 Hype Charges, a button appears that allows Beowulf to activate HYPE MODE for 10 seconds. In HYPE MODE, Beowulf's throws are unbreakable, and many of his moves will have different properties. |
| + | == Biography == |
||
| − | In HYPE MODE, Beowulf's throws are unbreakable, and many of his moves will have different properties. |
||
| + | Known world-wide for felling the Gigan warrior Grendel and for his illustrious career in the ring, '''Beowulf''' had secured himself a spot in the history books as a champion. But a mediocre acting career after leaving the ring tarnished his legacy. |
||
| + | Now, as the Canopy Kingdom faces a new threat, Beowulf enters the ring once more, determined to relive the glory, and in doing so stumbles upon the truth about his past… Will Beowulf be able to overcome this new threat to the city and his legacy? Or is this his final taste of the spotlight? |
||
==Abilities== |
==Abilities== |
||
{{SGM CA |
{{SGM CA |
||
|Name = HYPE MODE |
|Name = HYPE MODE |
||
| − | |CA = |
+ | |CA = Get 1 Hype Charge with every THROW and every 30 seconds. 3 Hype Charges lets you trigger HYPE MODE! During HYPE MODE, THROWS cannot be broken, and many attacks feature surprising upgrades. |
}} |
}} |
||
{{SGM MA |
{{SGM MA |
||
|Name = TITLE FIGHT |
|Name = TITLE FIGHT |
||
|Name1 = CHALLENGER |
|Name1 = CHALLENGER |
||
| − | |MA1 = Beowulf |
+ | |MA1 = Beowulf deals {{Num|5/15%}} bonus damage anytime his HEALTH% is LOWER than his opponent's |
|Name2 = DEFENDING CHAMP |
|Name2 = DEFENDING CHAMP |
||
| − | |MA2 = Beowulf |
+ | |MA2 = Beowulf deals {{Num|5/15%}} bonus damage anytime his HEALTH% is HIGHER than his opponent's |
}} |
}} |
||
| + | |||
==Variants== |
==Variants== |
||
On mobile devices, tap on the variant '''text''' to navigate to their page, not their card. |
On mobile devices, tap on the variant '''text''' to navigate to their page, not their card. |
||
| Line 49: | Line 51: | ||
|[[Image:Beowulf_Dark_Might_Card_D.png|125px|Dark Might|link=Dark Might]]<center>[[Dark Might]]</center> |
|[[Image:Beowulf_Dark_Might_Card_D.png|125px|Dark Might|link=Dark Might]]<center>[[Dark Might]]</center> |
||
|[[Image:Snake Bite.png|125px|Snake Bite|link=Snake Bite]]<center>[[Snake Bite]]</center> |
|[[Image:Snake Bite.png|125px|Snake Bite|link=Snake Bite]]<center>[[Snake Bite]]</center> |
||
| + | |[[Image:Beast King.png|125px|Beast King|link=Beast King]]<center>[[Beast King]]</center> |
||
|} |
|} |
||
<br /> |
<br /> |
||
| Line 55: | Line 58: | ||
{| class="article-table" border="1" cellspacing="1" cellpadding="1" style="width:100%;" |
{| class="article-table" border="1" cellspacing="1" cellpadding="1" style="width:100%;" |
||
|- |
|- |
||
| − | ! scope="col" |Icon |
+ | ! scope="col" style="width:15%;"|<center>Icon |
| − | ! scope="col" |Name |
+ | ! scope="col" style="width:35%;"|<center>Name |
| − | ! scope="col" |Description |
+ | ! scope="col" style="width:50%;"|<center>Description |
|- |
|- |
||
| − | | height="120px" width="120px" valign="middle" |<center>[[Image:ArooReady.png| |
+ | | height="120px" width="120px" valign="middle" |<center>[[Image:ArooReady.png|100px|Aroo Ready?]]</center> |
| − | |'''AROO READY?''' |
+ | |<center>'''AROO READY?''' |
| − | |TAUNT your opponent to gain HASTE for |
+ | |TAUNT your opponent to gain HASTE for {{Num|10/12/15}} seconds. |
| − | Gives 1 |
+ | Gives 1 Hype Charge on successful use. |
|- |
|- |
||
| − | | height="120px" width="120px" valign="middle" |<center>[[Image:BeoBurst.png| |
+ | | height="120px" width="120px" valign="middle" |<center>[[Image:BeoBurst.png|100px|Burst]]</center> |
| − | |'''BURST''' |
+ | |<center>'''BURST''' |
| − | |On HIT, inflict SLOW for |
+ | |On HIT, inflict SLOW for {{Num|5/7/10}} seconds. |
|- |
|- |
||
| − | | height="120px" width="120px" valign="middle" |<center>[[Image:GiganArmSweep.png| |
+ | | height="120px" width="120px" valign="middle" |<center>[[Image:GiganArmSweep.png|100px|Gigan Arm Sweep]]</center> |
| − | |'''GIGAN ARM SWEEP''' |
+ | |<center>'''GIGAN ARM SWEEP''' |
| − | |On HIT, inflict BLEED for |
+ | |On HIT, inflict BLEED for {{Num|4/8/12}} seconds. |
|- |
|- |
||
| − | | height="120px" width="120px" valign="middle" |<center>[[Image:HurtingHurdle.png| |
+ | | height="120px" width="120px" valign="middle" |<center>[[Image:HurtingHurdle.png|100px|Hurting Hurdle]]</center> |
| − | |'''HURTING HURDLE''' |
+ | |<center>'''HURTING HURDLE''' |
| − | |Has a |
+ | |Has a {{Num|25/50/100%}} increased chance to land a CRITICAL HIT. |
|- |
|- |
||
| − | | height="120px" width="120px" valign="middle" |<center>[[Image:StrikerKick.png| |
+ | | height="120px" width="120px" valign="middle" |<center>[[Image:StrikerKick.png|100px|Striker Kick]]</center> |
| − | |'''STRIKER KICK''' |
+ | |<center>'''STRIKER KICK''' |
| − | |Forces |
+ | |Forces the opponent to TAG OUT on HIT, removing all COMBAT EFFECTS. |
|- |
|- |
||
| − | | height="120px" width="120px" valign="middle" |<center>[[Image:WulfBlitzer.png| |
+ | | height="120px" width="120px" valign="middle" |<center>[[Image:WulfBlitzer.png|100px|Wulf Blitzer]]</center> |
| − | |'''WULF BLITZER''' |
+ | |<center>'''WULF BLITZER''' |
| − | |25 |
+ | |{{Num|25/50%}} chance on HIT to inflict ARMOR BREAK for {{Num|5/7}} seconds.<br />Tap up to 3 times (4 if used in HYPE MODE). |
|- |
|- |
||
| − | | height="120px" width="120px" valign="middle" |<center>[[Image:WulfShoot.png| |
+ | | height="120px" width="120px" valign="middle" |<center>[[Image:WulfShoot.png|100px|Wulf Shoot]]</center> |
| − | |'''WULF SHOOT''' |
+ | |<center>'''WULF SHOOT''' |
| − | |Command grab. Gives |
+ | |Command grab. Gives 1 Hype Charge on successful use. |
|} |
|} |
||
==Blockbusters== |
==Blockbusters== |
||
| − | {| class="article-table" border="1" cellspacing="1" cellpadding="1" style="width |
+ | {| class="article-table" border="1" cellspacing="1" cellpadding="1" style="width:100%;" |
|- |
|- |
||
| − | ! scope="col" |Icon |
+ | ! scope="col" style="width:15%;"|<center>Icon</center> |
| − | ! scope="col" |Name |
+ | ! scope="col" style="width:20%;"|<center>Name</center> |
| − | ! scope="col" |Gear |
+ | ! scope="col" style="width:15%;"|<center>Gear Points</center> |
| − | ! scope="col" |Description |
+ | ! scope="col" style="width:50%;"|<center>Description</center> |
|- |
|- |
||
| height="120px" width="120px" valign="middle" |<center>[[Image:GeatishTrepak.png|120px|Geatish Trepak]]</center> |
| height="120px" width="120px" valign="middle" |<center>[[Image:GeatishTrepak.png|120px|Geatish Trepak]]</center> |
||
| − | |'''GEATISH TREPAK''' |
+ | |<center>'''GEATISH TREPAK''' |
|<center>'''3'''</center> |
|<center>'''3'''</center> |
||
| − | |Level 1 Blockbuster<br /> |
+ | |Level 1 Blockbuster<br />{{Num|15/20/25%}} bonus damage if used in HYPE MODE. |
|- |
|- |
||
| height="120px" width="120px" valign="middle" |<center>[[Image:GiganticArm.png|120px|Gigantic Arm]]</center> |
| height="120px" width="120px" valign="middle" |<center>[[Image:GiganticArm.png|120px|Gigantic Arm]]</center> |
||
| − | |'''GIGANTIC ARM''' |
+ | |<center>'''GIGANTIC ARM''' |
|<center>4</center> |
|<center>4</center> |
||
| − | |Level 1 Blockbuster<br /> |
+ | |Level 1 Blockbuster<br />{{Num|15/25%}} chance on HIT to STUN opponent for {{Num|4/6}} seconds. |
|- |
|- |
||
| height="120px" width="120px" valign="middle" |<center>[[Image:LupinePummel.png|120px|Lupine Pummel]]</center> |
| height="120px" width="120px" valign="middle" |<center>[[Image:LupinePummel.png|120px|Lupine Pummel]]</center> |
||
| − | |'''LUPINE PUMMEL''' |
+ | |<center>'''LUPINE PUMMEL''' |
|<center>4</center> |
|<center>4</center> |
||
| − | |Level 2 Blockbuster<br /> |
+ | |Level 2 Blockbuster<br />{{Num|25/35/50%}} chance on HIT to inflict CRIPPLE and SLOW for {{Num|10}} seconds. |
|- |
|- |
||
| height="120px" width="120px" valign="middle" |<center>[[Image:Airwulf.png|120px|Airwulf]]</center> |
| height="120px" width="120px" valign="middle" |<center>[[Image:Airwulf.png|120px|Airwulf]]</center> |
||
| − | |'''AIRWULF''' |
+ | |<center>'''AIRWULF''' |
|<center>5</center> |
|<center>5</center> |
||
| − | |Level 2 Blockbuster<br /> |
+ | |Level 2 Blockbuster<br />{{Num|25/35/50%}} chance on HIT to inflict ARMOR BREAK and SLOW for {{Num|10}} seconds. |
|- |
|- |
||
| height="120px" width="120px" valign="middle" |<center>[[Image:Wulfamania.png|120px|Wulfamania]]</center> |
| height="120px" width="120px" valign="middle" |<center>[[Image:Wulfamania.png|120px|Wulfamania]]</center> |
||
| − | |'''WULFAMANIA''' |
+ | |<center>'''WULFAMANIA''' |
|<center>7</center> |
|<center>7</center> |
||
| |
| |
||
| − | Level 3 Blockbuster (UNBLOCKABLE)<br />If used to defeat an opponent, gain HASTE for |
+ | Level 3 Blockbuster (UNBLOCKABLE)<br />If used to defeat an opponent, gain HASTE for {{Num|10/12/15}} seconds. |
|- |
|- |
||
| height="120px" width="120px" valign="middle" |<center>[[Image:ThreeWulfMoonsault.png|120px|Three Wulf Moonsault]]</center> |
| height="120px" width="120px" valign="middle" |<center>[[Image:ThreeWulfMoonsault.png|120px|Three Wulf Moonsault]]</center> |
||
| − | |'''THREE WULF MOONSAULT''' |
+ | |<center>'''THREE WULF MOONSAULT''' |
|<center>8</center> |
|<center>8</center> |
||
| − | |Level 3 Blockbuster (UNBLOCKABLE)<br />Reduces the |
+ | |Level 3 Blockbuster (UNBLOCKABLE)<br />Reduces the opponent's BLOCKBUSTER METER by {{Num|10/15/25%}} per landed HIT. |
|} |
|} |
||
| + | |||
==Hype Mode== |
==Hype Mode== |
||
*Moves that are affected by Hype Mode |
*Moves that are affected by Hype Mode |
||
| − | {| class="article-table" |
+ | {| class="article-table" border="1" cellspacing="1" cellpadding="1" style="width:100%;" |
!Move |
!Move |
||
!Controls |
!Controls |
||
| Line 144: | Line 148: | ||
|- |
|- |
||
|Wulfshoot |
|Wulfshoot |
||
| − | |Special |
+ | |Special Move |
|Wulfshoot obtains an extra grab attack. |
|Wulfshoot obtains an extra grab attack. |
||
|- |
|- |
||
| Line 153: | Line 157: | ||
|Lupine Pummel |
|Lupine Pummel |
||
|Tier 2 Blockbuster |
|Tier 2 Blockbuster |
||
| − | |Doubles the number of head butts performed by Beowulf (from 4 to 8); number of kicks still 3 |
+ | |Doubles the number of head butts performed by Beowulf (from 4 to 8); number of kicks still 3. |
|- |
|- |
||
|Airwulf |
|Airwulf |
||
| Line 168: | Line 172: | ||
|Final hit deals slightly more damage. |
|Final hit deals slightly more damage. |
||
|} |
|} |
||
| + | |||
==Combos== |
==Combos== |
||
Beowulf generally has a lower maximum combo count than the other characters and is best played as a grappler. Despite this, Beowulf's individual hits deal a ton of damage and can be extended by bouncing your opponent off the wall. In addition to that, he has a unique mechanic called Hype Mode where all his grabs become unbreakable and several of his moves get additional hits and beneficial effects. |
Beowulf generally has a lower maximum combo count than the other characters and is best played as a grappler. Despite this, Beowulf's individual hits deal a ton of damage and can be extended by bouncing your opponent off the wall. In addition to that, he has a unique mechanic called Hype Mode where all his grabs become unbreakable and several of his moves get additional hits and beneficial effects. |
||
| Line 222: | Line 227: | ||
=== Unknown === |
=== Unknown === |
||
*Dash > L5 > Up > Dash > L2 > Hurting Hurdle > Dash > L2 > Wulf Blitzer > Dash > L2 > Gigantic Arm or Airwulf |
*Dash > L5 > Up > Dash > L2 > Hurting Hurdle > Dash > L2 > Wulf Blitzer > Dash > L2 > Gigantic Arm or Airwulf |
||
| + | |||
| + | == Gallery == |
||
| + | <gallery> |
||
| + | Full Beowulf Combo Guide and Combo Compilation!! Chair Gang😤 - SkullGirls Mobile|Guide by OddLegend |
||
| + | Skullgirls Mobile - Beowulf Basic to Advanced Combos|Guide by LordOozy |
||
| + | -Beginner Guide - Skullgirls Mobile- Easy Gameplay for Beowulf|Guide by ZeoW |
||
| + | </gallery> |
||
[[Category:Characters]] |
[[Category:Characters]] |
||
[[Category:Beowulf]] |
[[Category:Beowulf]] |
||
Revision as of 01:16, 23 March 2021
Beowulf is a grappler who can be described as a “power-play” character. At various times throughout a fight, he will get large spikes of power due to his Character Ability: HYPE MODE. Players will need to tactically take advantage of it in order to maximize Beowulf’s potential.
While fighting, Beowulf's Throws (including Special Move Throws) and Juggle Finishers will generate one Hype Charge. Beowulf also gains one Hype Charge every thirty seconds in the fight. Once Beowulf gets 3 Hype Charges, a button appears that allows Beowulf to activate HYPE MODE for 10 seconds. In HYPE MODE, Beowulf's throws are unbreakable, and many of his moves will have different properties.
Biography
Known world-wide for felling the Gigan warrior Grendel and for his illustrious career in the ring, Beowulf had secured himself a spot in the history books as a champion. But a mediocre acting career after leaving the ring tarnished his legacy.
Now, as the Canopy Kingdom faces a new threat, Beowulf enters the ring once more, determined to relive the glory, and in doing so stumbles upon the truth about his past… Will Beowulf be able to overcome this new threat to the city and his legacy? Or is this his final taste of the spotlight?
Abilities
Character Ability
Marquee Ability: TITLE FIGHT
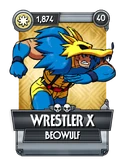
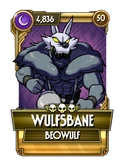
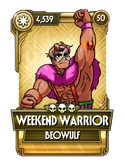
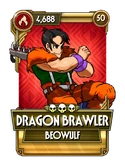
Variants
On mobile devices, tap on the variant text to navigate to their page, not their card.
Bronze:
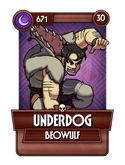 |
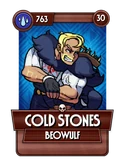 |
Silver:
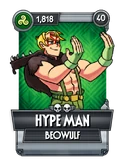 |
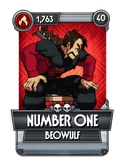 |
 |
Gold:
 |
 |
 |
 |
Diamond:
 |
 |
 |
Special Moves
Blockbusters
Hype Mode
- Moves that are affected by Hype Mode
| Move | Controls | Added Effect |
|---|---|---|
| Aerial | Tap after Launcher | Aerial ends with an extra grab movement, sending the enemy up higher than normal Aerial. |
| Throw | Upside swipe with two fingers | Throw becomes unbreakable and gains an extra grab attack. |
| Wulfshoot | Special Move | Wulfshoot obtains an extra grab attack. |
| Geatish Trepak | Tier 1 Blockbuster | Ends with another animation, with Beowulf smiling to the crowd and temporarily locking the foe in place before forcing them to the edge of the screen. Allows for follow-ups. |
| Lupine Pummel | Tier 2 Blockbuster | Doubles the number of head butts performed by Beowulf (from 4 to 8); number of kicks still 3. |
| Airwulf | Tier 2
Blockbuster |
Cosmetic: If used to defeat the final opponent, penguin referee emerges. |
| Wulfmania | Tier 3 Blockbuster | Ends with Airwulf. Cosmetic: if used to defeat final opponent, penguin referee emerges. |
| Three Wulf Moonsault | Tier 3 Blockbuster | Final hit deals slightly more damage. |
Combos
Beowulf generally has a lower maximum combo count than the other characters and is best played as a grappler. Despite this, Beowulf's individual hits deal a ton of damage and can be extended by bouncing your opponent off the wall. In addition to that, he has a unique mechanic called Hype Mode where all his grabs become unbreakable and several of his moves get additional hits and beneficial effects.
It should be noted that Beowulf has two excellent grappling Blockbusters. Grappling Blockbusters have the unique property among all other Blockbusters in that they cannot be blocked or broken.
Notes
- L5 means a chain of 5 normal ground attacks. (Usually by tapping 5 times on the screen)
- Up or Launcher means the normal move that sends your opponent in the air (performed by swiping up)
- A5 means a chain of 5 normal air attacks. (usually by tapping once right after having launched your opponent)
- Grab refers to throwing your opponent. (Done by swiping with 2 fingers)
- Dash means a dash attack (Swipe right)
- Trip means a trip attack (Swipe down once)
- Charge is a powered attack (Press and hold for a few moments to charge then release)
- Special thanks ot OozyGamer for the combo video.
- Just like a real life wrestler, Beowulf loves to bounce his enemies off the ring walls. Which is why several of his combos require him to be at a specific distance from the right corner. Combos that specify (Right 1/3 screen) really just mean that you need to start the fight at one third of the total ring's distance from the right corner.
- Similarly, combos that specify "corner" need to be started at the extreme right corner when the opponent has no space to move.
- As a fellow wrestler (and because her hitboxes are quite weird), Cerebella is a nemesis to Beowulf. Several of Beowulf's combos don't work on her.
Pseudo combos
A large part of Beowulf's damage relies on grappling opponents with Geatish Trepak or Lupine Pummel right after they stand up. This in turn can effectively lock your opponent in a long chain which looks like a combo. These "fake" or pseudo combos cannot be considered true combos as they can be broken up with any Blockbuster or Swap.
However, they are extremely useful and represent a valid, but cheesy, playstyle.
- L5 > Up > A5, Wait for opponent to stand up, Geatish Trepak, Wait, Lupine Pummel
- (Wulf Shoot, Wait) x 5 (Must equip 5 different Wulf Shoots)
Standard combos
All standard combos can be broken with any "Burst" move by the opponent as long as they are not in the air or during a Blockbuster.
- Dash > L5 > Trip
- Dash > L5 > Geatish Trepak / Lupine Pummel
- Dash > L5 > Hurting Hurdle > Wulf Blizer x 3 > Gigantic Arm / Airwulf
- Dash > L5 > Up > A5 > L2 > Trip (Does not work on some characters)
- Dash > L5 > Up > A5 > Gigantic Arm
- Dash > L5 > Up > A5 > Wulf Blitzer x 3 > Gigantic Arm / Airwulf
- Dash > L5 > Up > A5 > Hurting hurdle > Gigantic Arm / Airwulf
- Charge > Hurting Hurdle > Gigantic arm
- [Hype Mode] Dash > L5 > Geatish Trepak > Gigantic Arm
Half screen
- L5 > Up > A5 > Dash > Dash > Hurting Hurdle > Gigantic Arm
1/3 screen
- L5 > Up > A5 > Dash > Dash > (wait for enemy to bounce off wall) > L3 > Gigantic Arm
- L5 > Up > A5 > Dash > Dash > (wait for enemy to bounce off wall) > L3 > Airwulf
- Dash > Dash > (wait for enemy to bounce off wall) > L2 > Gigantic Arm
Corner
- Charge > L2 > Wulf Blitzer x3 > Gigantic Arm / Airwulf (lightweight characters only)
- Charge > Dash > L2 > Gigantic Arm / Airwulf (lightweight characters only)
- Dash > L5 > Up > A5 > L2 > Hurting Hurdle > L2 > Wulf Blitzer > Gigantic Arm / Airwulf
- L5 > Wulfamania > L2 > Hurting Hurdle > L2 > Wulf Blitzer > L2 > Gigantic Arm
- [Hype Mode] Dash > L5 > Geatish Trepak > Gigantic Arm / Airwulf
Unknown
- Dash > L5 > Up > Dash > L2 > Hurting Hurdle > Dash > L2 > Wulf Blitzer > Dash > L2 > Gigantic Arm or Airwulf


